DIY Composting Toilet: A Complete Guide
Composting is an excellent way to improve the sustainability of your garden, as it creates highly enriched organic material to neutralize the soil from biodegradable waste, saving you a hefty sum while buying fertilizers.
While composting bins are typically filled with food scraps and plant material, you can also use human waste through composting toilets, and that’s where this article comes in handy!
In this comprehensive guide, we will walk you through everything you need to know about DIY composting toilets, including how they work, how to build one, and other essential tips. So without further ado, let’s dive right in!
How Does a Composting Toilet Work?
Composting toilets are a type of waste collection system that can turn human excrement, whether solid or liquid waste, into compost, which is a resource-rich material that you can use to fertilize the soil and enrich it with minerals and other nutrients.
Similar to regular toilets, this one has a toilet seat and waste collecting chamber, but unlike standard toilets, it works by breaking down the wastes through aerobic and/or anaerobic decomposition by the action of bacteria.
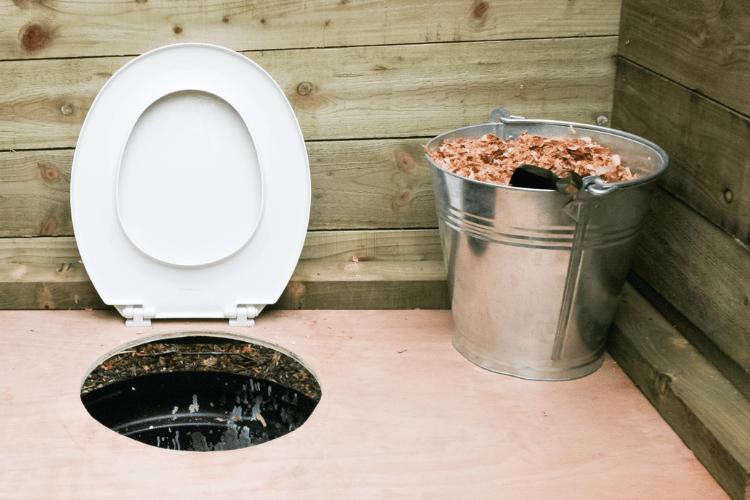
One of the primary differences between regular and composting toilets is that they separate solids from liquids. The liquid goes into the urine container while the solids are mixed with
carbon-rich additives and absorbents by an agitator, such as:
- Sawdust
- Dry leaves
- Peat moss
- Coconut coir
These materials maintain the carbon/nitrogen balance and create air pockets to lock the odor away after using the toilet. Once the toilet containers are full, you transfer their contents to a dedicated compost bin according to the guidelines and health regulations where you live.
Types of Composting Toilets
While most composting toilets have roughly the same concept, they can come in two main types/designs. Here’s a quick look at each one of them.
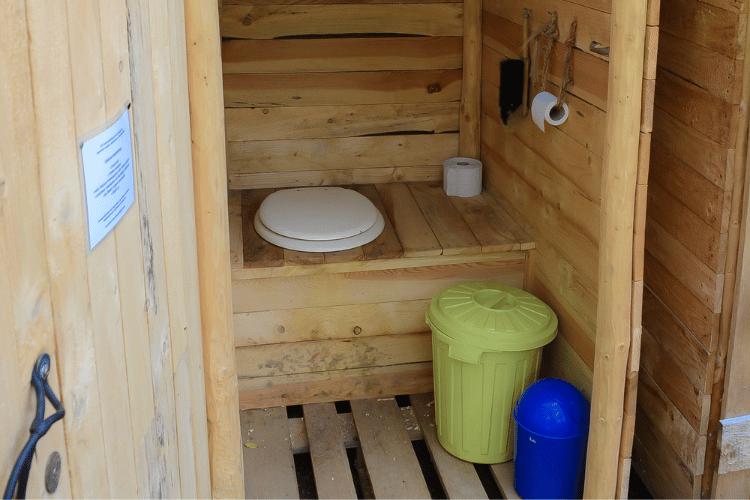
Self-Contained Composting Toilets
Self-contained toilets are the simplest types of composting toilets. As the name suggests, this type of toilet has a composting system built right into the toilet, which is usually directly under the toilet bowl.
These toilets are fairly small and quite portable, which makes them ideal for anything from residences and cabins to RVs, campers, and boats.
Centralized Composting Toilets
Split-type composting toilets, also known as central or remote composting toilets, are toilets that separate the waste collecting unit from the composting unit, hence the name.
While this system lacks portability, it allows you to connect multiple standard-looking traditional toilets to a large composting system, which you can place anywhere, including outside your house.
This system gives you better control of the size of the composting system, as you can connect the toilet to a huge bin, which makes it easier to maintain. This system is better suited for large houses but it’s quite complex to build.
How to Create Your Own Composting Toilet
Now that you know more about composting toilets, here’s everything you need to know to build your own.
Step 1: Gather the Necessary Tools and Supplies
The tools and materials necessary for building a DIY composting toilet can vary significantly depending on how complex you want the project to be. However, you can still build an effective toilet while maintaining simplicity.
Here are some of the tools and materials you’ll need to build a simple self-contained compost toilet:
- Buckets (one for solid and one for liquid)
- A sheet of plywood (preferably around 12mm)
- 4 planks of sturdy wood (2x4)
- Standard toilet seat
- Urine separator unit
- Wood stain, primer, paint (optional)
- Screws, wood glue, electric drill with screwdriver bit
- Handheld jigsaw with pocket hole jig
- Sandpaper and woodworking file
- Marker or pencil
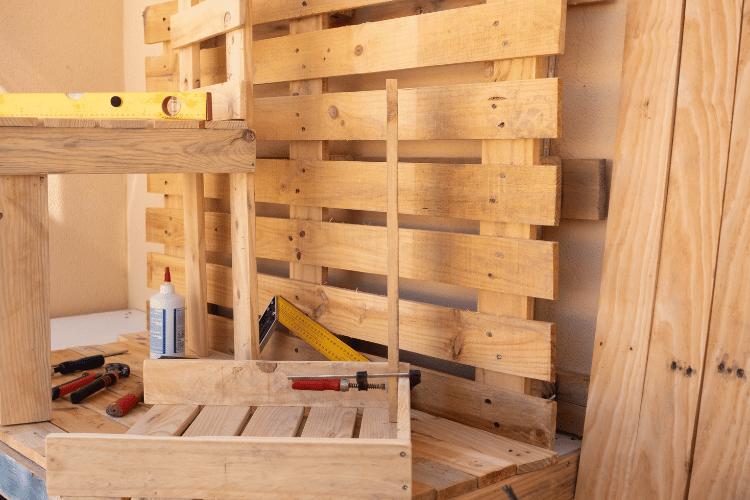
Step 2: Assemble the Main Frame
To build a reliable composting toilet box, you need to first take a few measurements and factors into consideration, such as:
- The desired size of the toilet
- The comfortable height
- The available space where you’ll set up the toilet
- Easy access to remove and empty the bucket (by making the top side of the box easily removable)
To build the toilet’s frame, you’ll need to cut the plywood sheet to create the sides of the toilet box.
You can cut them equally for a square-shaped box, or use smaller dimensions for the base and top if you want it rectangular. Make sure that you take the size of the toilet seat into account while measuring the top and base.
After cutting the pieces, attach them together to create a box. You can also use the pocket hole jig to strengthen the sides and improve the box’s overall aesthetics.
Step 3: Cut the Access Hole
Now that you have the box ready, you’ll need to cut the box’s top side to create access to the toilet bowl. The easiest and most convenient way to do this is by using the toilet seat as a template.
Simply place the toilet seat while opening the lid on the top side, and mark the inside circumference of the seat.
You can then use a marker to outline the access hole, which is preferably 1 to 2 inches wider than the inside circumference, and cut it with a jigsaw.
You should also use a woodworking file to finely adjust the access hole circumference, then finish up with some fine-grit sandpaper to make the seating more comfortable and presentable.
Step 4: Add Legs to the Box
Technically speaking, this step is optional. However, attaching legs to the box will protect the bottom of the seat from water damage, so we highly recommend adding them. Make sure that you include the legs’ height while measuring the overall height of the toilet.
Use screws and an electric drill to firmly attach each leg to one corner of the box, and make sure that the unit is stable and doesn’t wiggle around. You can adjust the height and stabilize the legs by using a woodworking file.
Step 5: Prime and Paint the Box
Another optional yet highly effective protective measure to consider here is priming and painting your composting toilet.
By painting the toilet seat, you’ll massively improve its overall looks and help it blend with the surroundings.
Additionally, painting the box adds an extra protective layer that prevents water from damaging the toilet box. If you prefer wooden-style aesthetics, staining the box will get the job done nicely.
Step 6: Attach a Urine Separating Channel
Keeping the urine and solid waste separated is an essential element of a successful composting toilet, as it eliminates foul odor and keeps solid waste as dry as possible.
Make sure that you buy a suitable-sized urine separator, and follow the user manual to properly install it, which is usually by attaching it to the bottom of the topside plywood sheet.
Keep in mind that you might need to drill holes to attach the separator, so make sure that you also account for them while outlining the toilet box.
Step 7: Install the Toilet Seats
The final piece that you need to add to the main toilet’s frame is the toilet seat. Here’s how to properly do it:
- Choose a suitable and comfortable toilet seat
- Place the seat over the access hole that you’ve previously cut
- Test the placement by sitting on the toilet seat to see if it’s comfortable for you.
- Mark the screw holes with a marker or a pencil, then drill the holes to attach and fasten the screws firmly to prevent the seat from shifting around.
Step 8: Add the Collecting Buckets
Ideally, you need to attach two buckets to the composting toilet to keep liquid and solid wastes separated. If you’re short on space, you can get a 5-gallon bucket for solid wastes and a smaller one for urine collection.
Place the buckets inside the composting toilet by detaching the removable topside, and make sure that they’re positioned to collect different forms of waste separately.
Step 9: Add Absorbents into the Bucket
With everything in place, all that’s left to have a functional DIY compost toilet is to add the absorbent material inside the collecting buckets.
As previously established, you can use a wide range of absorbent materials for that purpose, including wood ash, leaves, and other dry materials.
Ideally should always include a little bit of sawdust at the bottom to absorb moisture and keep the solid waste as dry as possible.
Step 10: Improve the Toilet’s Functionality Through Extra Attachments
You now have a functional DIY composting toilet that you can use anywhere. However, you can improve your toilet’s efficiency by adding some extra parts, such as:
- Built-in fans and vents: These help in ventilating and drying the waste, which reduces excess moisture and controls odor. You can also power those fans with solar panels to save energy.
- Agitator with spider handle: This system makes it easier to stir the content of the bucket with the absorbent materials in the bucket, which is the equivalent of flushing in regular toilets.
What Are the Advantages of Having a DIY Compost Toilet?
There are plenty of reasons why you should consider opting for a DIY composting toilet. Here are some of the advantages that those toilets can offer:
- Highly Sustainable and Saves Resources: The average household flushes away over 12,775 gallons of water per year. By using composting toilets, you can save all that water while producing highly fertile compost for your soil.
- Surprisingly Odorless: Since solid and liquid waste remain separated in composting toilets, the bacteria that cause foul odor remain mostly inactive, which reduces odors significantly.
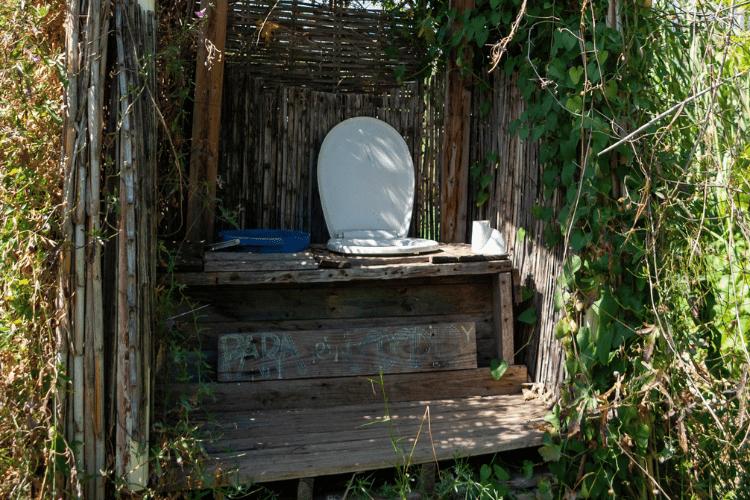
- Excellent for Living Off the Grid: Composting toilets can be highly compact and portable, which allows you to use them anywhere. Since you don’t need to connect them to septic systems, you can effectively live off the grid using a reliable composting toilet.
- Doesn’t Need Plumbing: Since you don’t use any water or septic systems, you also don’t need any plumbing while creating a self-contained toilet. However, you might still need some plumbing experience if you’re building a centralized one.
- Easy to Build: Composting toilets have a simple design that doesn’t need special tools or high experience to build, so you can build your own even if you’re a beginner DIYer.
Important Compost Toilet Tips to Keep in Mind
Lastly, here are some essential pointers and tips to put into consideration before building your composting toilet.
Always Keep Liquid and Solid Waste Separate
Combining solid and liquid wastes is the primary cause of the foul waste odor, so you’ll be missing out on one of the main advantages of composting toilets, which is the limited odor.
You’ll Need to Empty the Toilet Regularly
Once the bucket becomes almost full, you’ll need to take it out and empty it in the composting bin. This can get tedious with time, especially with smaller buckets.
For that reason, you should always have at least two spare buckets to make the swapping process easier.
Cleaning the Toilet Will Help it Function Better and Last Longer
Moisture and lack of maintenance can damage your toilet in the long run, so you should try to maintain a cleaning schedule to make sure it stays in good condition. This is also essential from a health and hygiene standpoint.
You Can Buy Ready-Made Alternatives
While the process of building a composting toilet from scratch is fairly easy, you’re not out of options if you can’t make your own. Luckily, there are plenty of commercial and ready-made composting toilets available out there.
Final Thoughts
There you have it! A brief guide that walks you through everything you need to know about DIY composting toilets and how to make your own!
As you can see, the building process is fairly easy and uses simple tools and materials, so you shouldn’t have a hard time making one. If you want to find out more information about portable restrooms and rental porta-potties, don’t hesitate to contact our team to get a quote.